
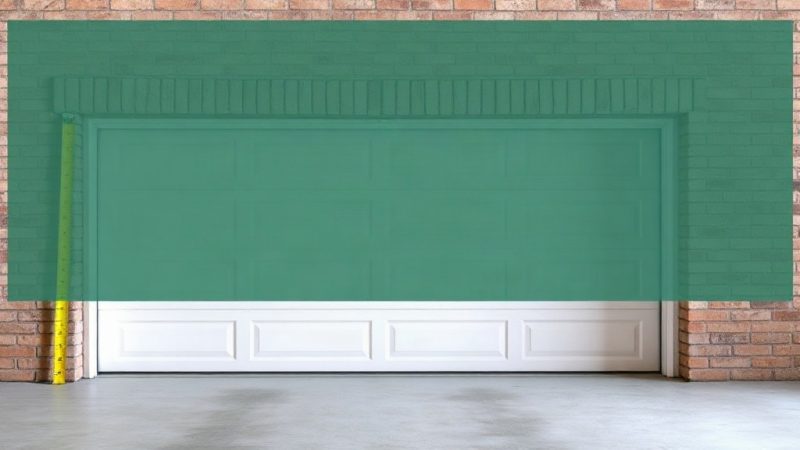
A new garage door can cost anywhere from a few hundred to several thousand dollars, and most of that money is wasted if the door arrives a half inch too wide or too short. Knowing how to measure your garage opening before buying turns a risky purchase into a straightforward one. A few careful measurements, taken in the right places and double-checked, tell you the exact size the manufacturer needs. Home Plan Idea is a useful reference for anyone planning a garage upgrade alongside the door itself.
Quick answer: Measure the opening’s width and height at several points, then measure the headroom, side room, and back room your new door needs to operate. Record the smallest width and height you find, confirm the door type fits those clearances, and give the manufacturer those figures rather than the old door’s size.
What is measure your garage opening before buying?
The task is a specific set of dimensions taken from the opening itself, not from the old door. Garage doors are built to order from three or four key figures. If those figures are wrong, the door will not fit, and returns are rarely simple on a custom product.
Start with the opening width. Pull the tape from the left jamb to the right jamb at the floor. Repeat the measurement at the top and at the midpoint. The three readings usually differ by a small amount because framing and concrete are rarely perfect. Write down the smallest figure, since the door must clear the tightest point.
Next, measure the opening height. Run the tape from the floor to the underside of the header at the left side, the center, and the right side. Again, record the smallest number. A floor that slopes toward a drain can make one side higher than the other by an inch or more, and that difference matters.
The headroom comes next. Measure from the top of the opening up to the lowest obstruction on the ceiling, such as a light fixture, a beam, or a duct. This figure decides whether a standard sectional door will fit or whether you need a low-headroom track. Sectional doors need roughly 12 inches of headroom above the opening for standard track; low-headroom kits can work in as little as about 6 to 8 inches, but they limit how the door travels.
Side room and back room complete the picture. Side room is the clear space from the edge of the opening to the nearest wall, post, or obstruction, measured on both sides. Most sectional doors need at least 3.5 to 4 inches on each side for the track. Back room is the distance from the opening back into the garage; it must be at least the door’s height plus a few inches so the panels can slide up and back under the ceiling.
A sketch of the opening with each dimension labeled and a note on where you measured prevents mix-ups when you talk to a salesperson. Manufacturers often ask for the same figure twice to catch errors, and a clear sketch answers those questions in one step.
Takeaway: the opening size is only half the job; headroom, side room, and back room decide which door types can actually operate in your garage.
Why measure your garage opening before buying matters

A wrong measurement causes problems that no installer can fully fix on site. A door that is an inch too wide will not slide into the opening. One that is too narrow leaves gaps that let in water, cold air, and pests. Door frames are not adjustable in the way window frames sometimes are, so the fit has to be right from the factory.
Money is the second reason. Custom doors are cut and built to your numbers, and once a door has been manufactured, returning it is rarely straightforward. Restocking fees, freight costs, and a second production run quickly add up. Getting the numbers right the first time avoids that entire sequence.
Safety and function matter just as much. A sectional door needs its tracks, springs, and panels to sit within specific tolerances. If the headroom is short and you buy a standard door anyway, the top panel can strike a beam or a light during travel. If the side room is tight, the track may not fit at all, and an installer will have to propose a narrower door or a different design.
The garage also affects the house. The door is often the largest moving object in a home, and its size shapes curb appeal, insulation performance, and how much room you keep inside the garage. Measuring first lets you compare the opening against standard sizes. Most single-car openings measure about 8 to 9 feet wide and 7 feet tall; double doors often run 16 feet wide. Knowing the standard garage door width options helps you see whether a stock size will fit or whether you need a custom build.
Takeaway: accurate measurement protects your budget, your schedule, and the safety of the finished installation, so it deserves more than a single quick check.
Best practices
Work with a helper and a steady tape. A second person keeps the tape level and true, which prevents the sag that throws off long measurements. A laser measure is faster, but a steel tape is easier to verify against the door frame.
Record every reading, not just the final one. Keep a simple table like this alongside your sketch:
| Dimension | Where to measure | Record |
|---|---|---|
| Width | Bottom, middle, top of opening | Smallest reading |
| Height | Left, center, right of opening | Smallest reading |
| Headroom | Opening top to lowest ceiling obstruction | Clear space |
| Side room | Opening edge to nearest obstruction, both sides | Smaller of the two |
| Back room | Opening to rear wall | Total depth |
Check the floor. If it slopes or has a raised lip, note it. Manufacturers may ask for a floor-to-header measurement at the lowest and highest points, because the door’s bottom seal needs to meet the floor evenly.
Verify the door type before you order. A roll-up door, a sectional door, and a single-panel tilt door each need different clearances. Confirm the required headroom and side room on the manufacturer’s specification sheet rather than assuming they match your current door.
Take photos. A wide shot of the interior and a close-up of each jamb, the header, and the ceiling give the salesperson context that numbers alone cannot. If an installer will visit, the photos let them prepare the right parts in advance.
Repeating the measurements on a second day catches reading errors and confirms the figures before you place a deposit. Keep both sets of notes until the door is installed.
Takeaway: measure from multiple points, record every reading, and match the results against the manufacturer’s requirement sheet before you commit to a model.
Common mistakes to avoid
The most frequent error is measuring the old door instead of the opening. Old doors can be trimmed, sagging, or slightly oversize, and their dimensions do not describe the frame the new door must fit. Always measure the opening itself.
Another common slip is taking just one width and one height. A single reading can land on a spot where the framing bows outward, hiding a tighter point a few inches away. Multiple readings and the smallest figure solve this.
Mixing up interior and exterior measurements causes trouble too. Some people measure from inside the garage, then buy based on those numbers; others measure the outside face of the trim. Be explicit about where you placed the tape, and use the inside face of the opening’s jambs, since that is where the door sits.
Forgetting the obstructions above and beside the opening leads to doors that cannot operate. A low-hanging garage door opener rail, a water heater, or a shelving unit can block the track path even when the opening itself is measured perfectly. Scan the full travel path of the new door before ordering.
Assuming a standard size will fit rounds out the list. Older homes sometimes have openings that fall between stock sizes, and forcing a standard door can mean cutting framing or accepting gaps. A custom size often costs less than the remedial work.
Measuring around an existing door is safe, but do not remove or adjust torsion springs or other tensioned hardware to gain access. That work belongs to a trained technician.
Takeaway: avoid these five errors, and the numbers you hand to the manufacturer will describe the opening accurately the first time.
FAQ
What tools do I need to measure a garage opening?
A steel tape measure of at least 16 feet, a notepad or measurement sheet, a pencil, and a helper are enough. A laser measure speeds up long distances, and a smartphone camera documents each area you measured.
Do I measure the opening or the trim around it?
Measure the inside face of the opening’s jambs, not the exterior trim. The door fits within the opening, so trim measurements overstate the size and produce a door that will not fit.
How much headroom does a new door need?
Standard sectional doors typically need about 12 inches of clear headroom above the opening. Low-headroom track systems can work with significantly less, but they change how the door travels, so confirm the requirement on the specific model’s specification sheet.
What if my opening is not a standard size?
Custom doors are built to your measurements, and the price increase is often modest compared with the cost of modifying framing. Give the manufacturer your smallest width and height readings and let them build to those figures.
Conclusion
Measuring before you buy comes down to a few disciplined steps: read the opening at several points, note the smallest width and height, and confirm headroom, side room, and back room against the door type you want. Those numbers protect your budget and prevent an installation day that ends in delays. Sketch the opening, take photos, and compare your figures with the manufacturer’s requirements. Then measure your garage opening before buying, place the order with confidence, and let the installer confirm the same dimensions when the door arrives.
