
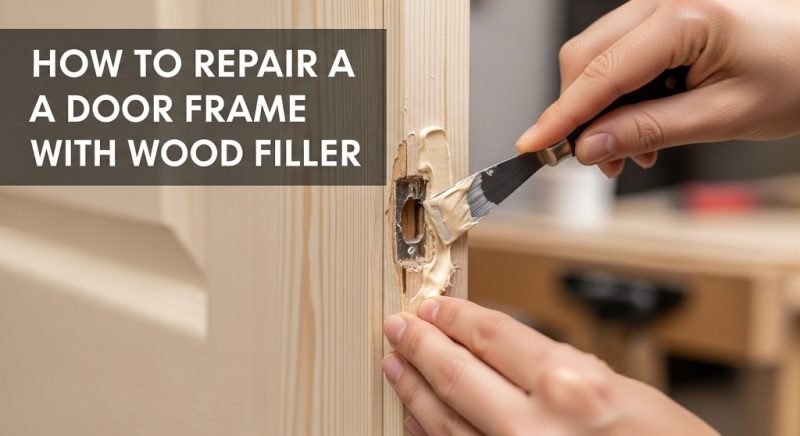
A warped or damaged door frame can turn a simple entryway into a daily frustration. Doors stick, drafts sneak in, and the whole house feels less secure. Fortunately, most homeowners successfully restore splintered, rotted, or dented frames using wood filler instead of replacing the entire jamb. According to the U.S. Department of Energy, proper door sealing reduces air leakage by up to 15%, while the National Association of Home Builders reports that minor frame repairs extend door system life by 10–20 years when done correctly. This comprehensive guide walks you through every stage so your repair looks professional and lasts decades.
Why Door Frames Get Damaged in the First Place
Understanding the root cause helps you prevent future problems. Moisture remains the number one enemy of wooden door frames. Humidity, rain splash-back, or poor sealing allows water to seep into the wood fibers.
Consequently, rot develops in as little as one season in high-humidity regions. Forced entries, slamming doors, and settling foundations create splits and cracks. Pets scratching or kids swinging on doors add surface gouges over time.
Moreover, older homes built before 1980 often used softer pine that dents easily under normal use. Recognizing these triggers lets you address both the symptom and the source during your repair.
When Wood Filler Works Best (and When It Doesn’t)
Wood filler excels at cosmetic and moderate structural fixes. You achieve excellent results on surface scratches, small-to-medium holes, cracked corners, and early-stage rot up to ¼-inch deep.
However, advanced rot that feels spongy or crumbles when poked requires complete wood replacement. Large missing chunks bigger than a golf ball rarely hold filler reliably long-term.
Similarly, frames with severe twisting from foundation shifts need professional carpentry. Always test the wood firmness first—if your screwdriver sinks in easily, cut out the bad section instead.
Essential Tools and Materials You Need
Gather everything before starting to keep the process smooth. Professionals recommend these items for flawless results.
- High-quality two-part wood filler (polyester or epoxy-based)
- Durable putty knife set (1-inch, 3-inch, and flexible 6-inch blades)
- 80-grit and 220-grit sandpaper plus sanding block
- Clean shop rags and mineral spirits
- Painter’s tape and plastic sheeting
- Wood hardener for soft spots
- Exterior-grade primer and paint that matches your trim
- Small chisel or oscillating multi-tool for cleanup
- Dust mask, gloves, and eye protection
Choose solvent-based or water-based filler depending on whether the frame is interior or exterior—exterior formulas resist weather better.
Safety Precautions Every Homeowner Should Follow
Protect yourself from the start. Wear a properly fitted dust mask because fine wood particles and filler dust irritate lungs.
Additionally, work in a well-ventilated area since many fillers release strong fumes during curing. Keep children and pets away until everything fully hardens and you complete painting.
Furthermore, secure the door open or remove it completely to avoid accidental swings during sanding.
Step 1: Prepare the Damaged Area Thoroughly
Preparation determines 80% of your success. Begin by removing the door from its hinges if damage sits near the strike plate or hinges.
Next, scrape away loose paint, splintered wood, and any soft rot using a 5-in-1 painter’s tool or chisel. Dig until you reach solid wood underneath.
Then, brush the area clean and vacuum thoroughly. Apply wood hardener generously to any marginally soft spots and let it penetrate for the recommended time—usually 10–20 minutes.
Step 2: Shape and Clean the Void Properly
Create a strong mechanical bond. Slightly undercut the edges of the damage so the void becomes dove-tailed—this prevents the filler from popping out later.
Afterward, wipe the entire repair zone with denatured alcohol or mineral spirits to remove oils and dust. Tape off surrounding trim with painter’s tape for clean lines.
Finally, lightly sand glossy paint around the area so primer adheres perfectly later.
Step 3: Choose the Right Wood Filler for Your Project
Not all fillers perform equally. Two-part epoxy fillers like Abatron WoodEpox or Minwax High-Performance offer the strongest bond for exterior doors and load-bearing areas.
Alternatively, Bondo All-Purpose or Elmer’s Carpenter’s Wood Filler Max suit interior repairs beautifully. Water-based options clean up easily with soap and water, while solvent-based versions shrink less.
Always check the label for outdoor rating if the frame faces weather.
Step 4: Mix and Apply Wood Filler Correctly
Accuracy matters when mixing. Follow the manufacturer’s ratio exactly—usually 1:1 by volume for two-part products.
Blend thoroughly on a disposable surface until the color becomes uniform with no streaks. Work quickly because pot life ranges from 5–20 minutes depending on temperature.
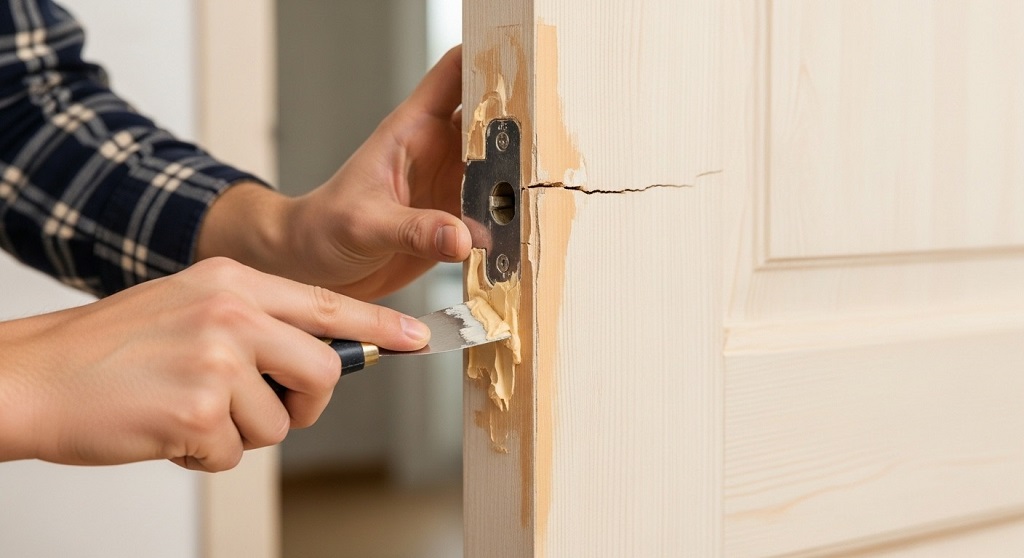
Press filler firmly into the void using your putty knife. Overfill slightly because filler shrinks as it cures. Smooth the surface immediately with light strokes.
Step 5: Achieve Professional Shaping While Still Workable
Shape the repair within the working time. Use the edge of your putty knife or custom contour tools made from cardboard to match existing molding profiles.
Moreover, wrap sandpaper around dowels or specialty shaping tools for rounded edges. Remove excess material before it fully hardens—this saves considerable sanding later.
Wipe your tools clean instantly with the recommended solvent to keep them reusable.
Step 6: Cure Time and Initial Sanding
Patience delivers flawless results. Allow full cure according to instructions—typically 2–24 hours depending on product and humidity.
Once rock-hard, begin sanding with 80- or 100-grit paper to level the repair flush with surrounding wood. Progress to 120-grit, then finish with 220-grit for paint-ready smoothness.
Consequently, vacuum sanding dust and wipe with a tack cloth before priming.
Step 7: Prime and Paint for Seamless Blending
Primer seals the filler and prevents flashing. Apply high-quality exterior-grade primer if the door faces outdoors.
Let it dry completely, then lightly sand with 320-grit paper. Paint with two thin coats of matching trim paint rather than one heavy coat.
Feather edges carefully so the repair disappears completely under normal viewing distance.
Common Mistakes That Ruin Door Frame Repairs
Many DIYers rush the process and regret it later. Skipping wood hardener on soft areas leads to recurring rot.
Similarly, underfilling or failing to overfill causes sunken patches after curing. Applying filler over loose paint guarantees peeling within months.
Another frequent error involves sanding too soon—impatient sanding creates scratches that show through paint forever.
How to Repair Rot on Exterior Door Jambs
Exterior frames demand extra steps. First, remove all rotted wood back to sound material, even if it means cutting a larger section.
Treat surrounding wood with borate solution to kill remaining fungus spores. Use epoxy consolidant before filling to restore strength.
Finally, topcoat with exterior spar varnish or high-quality enamel for maximum moisture protection.
Fixing Split Corners and Cracked Door Frames
Corner splits occur from impact or drying shrinkage. Open the crack slightly with a utility knife to allow deep filler penetration.
Inject epoxy filler using a syringe for best results. Clamp gently overnight after filling.
Sand and refinish the next day for an invisible repair.
Restoring Dents and Gouges Around Strike Plates
Strike plate areas suffer constant abuse. Remove the strike plate first. Fill dents proud of the surface, then reinstall the plate perfectly flush.
This simple step eliminates door latching problems forever.
Long-Term Prevention Strategies That Actually Work
Prevention beats repair every time. Install weatherstripping and door sweeps to keep rainwater away from the jamb bottom.
Additionally, maintain fresh paint or varnish every 3–5 years. Use kick plates on heavily used doors to protect lower sections.
Regularly inspect caulk lines around exterior trim and renew as needed.
When to Call a Professional Instead
Some situations exceed DIY limits. Severe structural twisting, extensive termite damage, or frames integral to load-bearing walls require expert attention.
Likewise, historic homes with irreplaceable molding often benefit from professional restoration. Invest in pros when the repair affects security or weatherproofing dramatically.
Related Topics: How to Tie in a Gable Roof to an Existing Roof: Step-by-Step Guide for Homeowners
Conclusion
You now possess every technique professionals use to restore damaged door frames beautifully with wood filler. Follow these steps methodically and your entryway will look brand new while gaining years of additional service life. Start gathering your materials today—your perfectly functioning door awaits!
Grab your tools, pick a weekend, and transform that annoying, drafty doorway into a smooth-operating feature you’ll enjoy daily. Your future self (and your heating bill) will thank you.
Related Topics: Best Keep-Warm Rice Cookers Under $30
FAQs
How long does wood filler last on a door frame?
High-quality two-part epoxy fillers last 15–25 years outdoors and essentially forever indoors when properly primed and painted.
Can I use regular spackling instead of wood filler?
No. Spackling cracks and crumbles under door movement. True wood filler contains resins that flex slightly and bond permanently.
Is wood filler strong enough for exterior doors?
Yes, when you choose exterior-rated epoxy or polyester formulas and seal them correctly. They withstand weather as well as new wood.
How soon can I rehang the door after repair?
Wait a minimum of 24 hours after painting for full hardness. Some epoxy fillers allow re-hanging in 6–8 hours, but 24 hours remains safest.
Will the repaired area look obvious?
Not when you follow proper sanding, priming, and painting techniques. Most repairs become completely invisible from three feet away.
References
- U.S. Department of Energy – Energy Saver: Air Sealing Your Home https://www.energy.gov/energysaver/air-sealing-your-home
- National Association of Home Builders – Housing Facts & Figures https://www.nahb.org/research/housing-data
- Fine Homebuilding – Repairing Rotted Door Jambs (2024 update) https://www.finehomebuilding.com/project-guides/doors
- This Old House – Wood Filler vs Wood Putty Guide https://www.thisoldhouse.com/carpentry/21017127/wood-filler-vs-wood-putty