
Painting a room sounds simple. You grab a brush, pick a color, and get started. However, the reality is often frustrating. Paint bleeds under the tape. Edges look uneven. Lines come out wobbly instead of crisp. The result? A finish that looks amateur, even after hours of hard work.
The good news is that painter’s tape, when used correctly, can solve all of these problems. You just need to know the right steps. This guide walks you through everything — from choosing the right tape to removing it without ruining your work. Follow these wall painting tips, and you will get the professional results you have always wanted.
Why Painter’s Tape Matters More Than You Think
Many people underestimate painter’s tape. They slap it on quickly and expect magic. When it fails, they blame the tape. In most cases, though, the tape is not the problem. The technique is.
Painter’s tape creates a physical barrier between two surfaces. It protects trim, ceilings, and adjacent walls from unwanted paint. When applied properly, it gives you clean paint lines that look like they were done by a professional. When applied poorly, paint seeps underneath and ruins the edge.
Understanding why bleeding happens is the first step to preventing it. Paint bleeds when the tape edge is not fully sealed to the wall. This leaves tiny gaps where liquid paint can flow through. Fortunately, this is entirely preventable.
Choosing the Right Painter’s Tape
Not all painter’s tape is the same. There are several types available, and each works best in specific situations.
Standard blue painter’s tape is the most common choice. It works well on smooth, primed walls and most indoor surfaces. It is easy to find and affordable.
Delicate surface tape is designed for fragile finishes. Use it on freshly painted walls, wallpaper, or delicate trim. It removes cleanly without pulling off the underlying surface.
High-adhesion tape is better for rough or uneven surfaces like brick, textured walls, or exterior wood. It sticks more firmly, which reduces the chance of bleeding.
Multi-surface tape is a good all-around option if you are working on a variety of materials in one project.
When in doubt, match the tape to the surface. Read the label carefully. Using the wrong type is one of the most common causes of paint bleeding.
Preparing the Surface Before Applying Tape
Surface preparation is often overlooked. However, it makes a huge difference in how well the tape performs.
Start by cleaning the wall. Dust, grease, and dirt all reduce adhesion. Use a damp cloth to wipe down the area where you plan to apply tape. Let it dry completely before moving on.
Next, check the surface for loose paint or peeling areas. Tape cannot stick properly to a damaged surface. Sand down any rough spots and prime bare areas if needed.
If you are working on a freshly painted wall, wait at least 24 hours before applying tape. Applying tape to wet or semi-cured paint is a recipe for disaster. The adhesive can bond too strongly and peel off the paint when removed.
Additionally, make sure the room temperature is within the tape manufacturer’s recommended range. Extreme cold can reduce adhesion. Extreme heat can cause the tape to stick too aggressively.
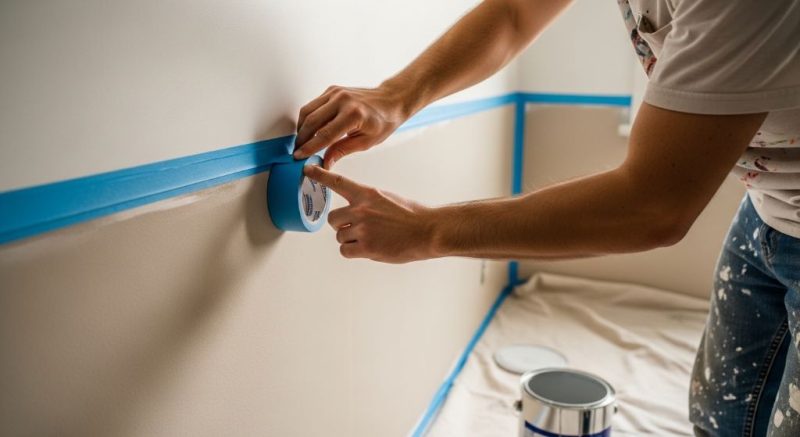
Applying the Tape the Right Way
This is where most people make critical mistakes. Applying tape correctly takes a little patience, but it pays off enormously.
Start by cutting a piece of tape that is slightly longer than the edge you want to cover. Do not stretch the tape as you apply it. Stretching causes it to curl at the edges, which creates gaps for paint to seep through.
Press the tape down gently along the edge first. Align it carefully. Take your time with this step, because even a small misalignment will show up in the final result.
Once the tape is positioned, use your finger or a putty knife to press it firmly into the surface. Work from one end to the other in a smooth, continuous motion. Pay extra attention to the inner edge — the one closest to where you will be painting. This edge needs to be completely sealed.
For corners, cut two separate pieces of tape rather than trying to fold one piece around the corner. Overlapping at corners creates a cleaner seal.
If you are taping along a ceiling or baseboard, use the edge of a flexible putty knife to push the tape into the corner. This eliminates air pockets that lead to bleeding.
The Sealing Step Most Painters Skip
Here is a professional secret that most DIY painters never learn: seal the tape edge before you paint.
After applying the tape, take a small brush or a folded piece of the tape itself and apply a thin coat of the same base color already on the wall — or a clear sealer — along the edge of the tape. Let it dry fully.
This step creates a secondary barrier. Even if paint seeps slightly under the tape, it will only reach this sealer coat, not the bare wall beneath. The result is a much sharper, cleaner edge.
Some painters also use a coat of clear acrylic caulk along the tape edge for an even tighter seal. This works especially well on textured surfaces where gaps are harder to eliminate.
Painting Techniques That Protect Your Edges
The way you apply paint also affects how clean your lines turn out.
Always paint away from the tape, not toward it. Load your brush or roller with paint, then stroke away from the tape edge rather than dragging paint into it. This reduces pressure on the tape and minimizes the chance of pushing paint underneath.
Use thin, even coats. Thick applications of paint are more likely to bleed. Two thin coats will always look better than one thick one. Additionally, thick paint takes longer to dry, which means more time for it to seep under the tape.
Do not overload your brush. Excess paint on the bristles increases dripping and bleeding. Tap off the excess against the side of your paint can before applying.
For roller work, use a small foam roller for areas near the tape. Foam rollers apply paint more smoothly and with less splatter than nap rollers. Therefore, they are a better choice when precision matters.
How Long Should You Leave the Tape On?
Timing matters more than most people realize. Leaving tape on too long or removing it too soon can both cause problems.
The best time to remove tape is while the paint is still slightly wet — not dripping, but not fully dry either. This is usually 30 minutes to an hour after your final coat, depending on the paint type and room temperature.
Removing tape while the paint is still a little tacky allows the edge to release cleanly. The paint film has not fully bonded to the tape yet, so it separates easily without tearing.
If the paint has dried completely, the tape can pull chunks of the dried paint film off with it. This leaves a jagged, uneven edge that is difficult to fix.
However, if you miss the ideal window and the paint is fully dry, all is not lost. Use a utility knife or a sharp box cutter to score along the tape edge before peeling. This breaks the paint film cleanly and prevents tearing.
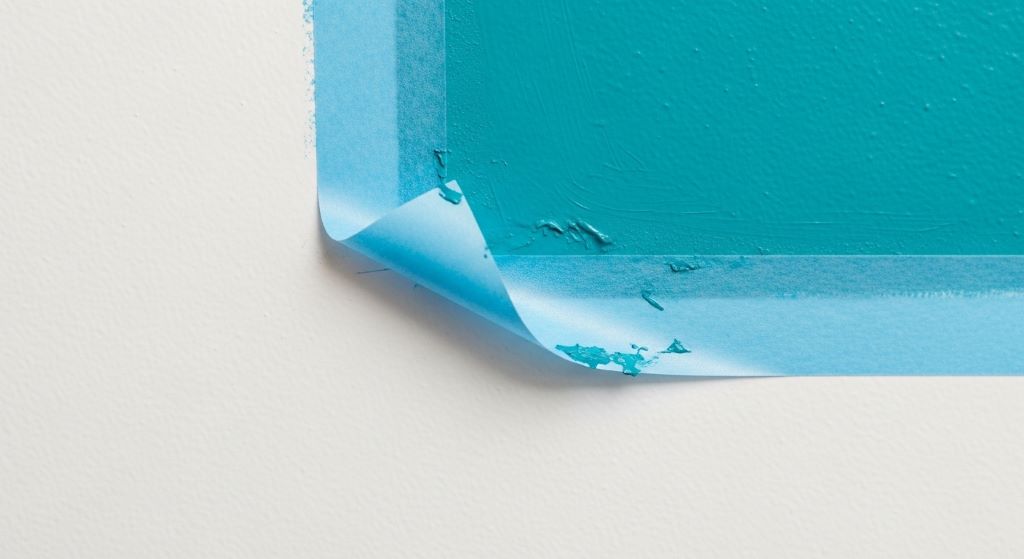
Removing the Tape Without Ruining Your Work
Removing painter’s tape is a step that requires care and patience.
Pull the tape back at a 45-degree angle, not straight up. Pulling upward puts too much stress on the paint edge and can cause it to lift. A 45-degree angle distributes the tension more evenly and produces a cleaner release.
Pull slowly and steadily. Jerking the tape off quickly is satisfying, but it often causes the paint to crack or tear along the edge.
If you feel resistance at any point, stop and score the edge with a knife before continuing. Never force the tape off.
Work in short sections rather than pulling off a long piece all at once. This gives you more control and lets you catch problems early.
Fixing Bleeding Edges After the Fact
Even experienced painters sometimes deal with a little bleeding. When it happens, do not panic. There are simple ways to fix it.
Wait until the paint is fully dry before attempting any repairs. Trying to fix wet paint usually makes things worse.
For small bleeds, use a fine artist’s brush and touch up with the original wall color. Work carefully and use light strokes to blend the repair into the surrounding area.
For longer bleeds, you may need to re-tape the area and paint over it with the correct color. Allow the repair coat to dry fully before removing the tape using the same careful technique described above.
Conclusion
Getting clean paint lines is not a matter of luck. It comes down to technique, preparation, and patience. Choose the right tape for your surface. Clean and prep the wall before applying tape. Press the tape down firmly, especially along the inner edge. Use the sealing trick to create a secondary barrier. Apply thin coats of paint and work away from the tape edge. Remove the tape at the right time and at the right angle.
These wall painting tips may seem like small details, but together they make a dramatic difference. Follow each step carefully, and you will be amazed at how professional your results look. A little extra effort upfront saves you from hours of touch-up work later. Now you have everything you need to get started with confidence.
Frequently Asked Questions
What is the best painter’s tape for smooth walls?
Blue painter’s tape, also known as standard masking tape for painters, works best on smooth, primed walls. It provides reliable adhesion without damaging the surface and is easy to remove cleanly.
Why does paint keep bleeding under my tape?
Paint bleeds when the tape edge is not fully sealed to the wall. This is usually caused by skipping surface prep, not pressing the tape down firmly enough, or using the wrong type of tape for the surface texture.
Can I leave painter’s tape on overnight?
It is not recommended. Leaving tape on overnight, especially if the paint dries fully, increases the risk of the tape bonding too strongly to the surface. This can pull off paint when you remove it. Remove tape within a few hours of applying the final coat.
Does it matter which direction I paint near the tape?
Yes, it matters. Always paint away from the tape edge, not toward it. Painting toward the tape pushes paint underneath it. Painting away keeps the pressure off the tape and reduces bleeding.
How do I get a sharp line on a textured wall?
Textured walls are trickier because the surface is uneven. Use high-adhesion tape, press it down as firmly as possible, and apply a thin sealing coat along the tape edge before painting. A coat of clear acrylic caulk along the tape edge can also help fill gaps caused by the texture.
Related Topics:
How to Renovate an Office in Dubai: Latest Trends & Tips
How to Attach PVC Trim to Concrete: A Comprehensive Guide