

DIY projects feel empowering right up until the first tough cut goes sideways—splintered edges, wasted boards, and that sinking feeling that your “simple” plan just got expensive. Many home projects fail at the same point: the tool doesn’t match the job. A full-size saw can feel intimidating and unwieldy for small indoor tasks, while a basic hand tool can turn a quick cut into a sweaty, inaccurate struggle.
That’s why a Compact circular saw makes such a difference for everyday makers. If you want a nimble tool that tackles real materials without demanding a workshop setup, the Compact circular saw category—especially the G LAXIA mini circular saw—hits a sweet spot for control, convenience, and clean results.
In this guide, you’ll learn what makes the G LAXIA Mini Circular Saw so useful, which DIY jobs it excels at, how to use it safely, and how to get better cuts even if you’re new to power tools.
What makes the G LAXIA Mini Circular Saw different?
A mini circular saw shrinks the footprint of a traditional circular saw while keeping the core advantage: fast, repeatable, straight cuts. You get more speed and consistency than a manual tool, without the bulk and learning curve that often come with larger saws.
According to industry experts, most DIYers benefit more from control than raw power for home tasks. The G LAXIA’s “mini” format supports that idea: it’s easier to guide, easier to store, and less stressful to bring out for quick work.
Key advantages for DIYers
A compact unit earns its place when it saves time, improves accuracy, and reduces friction—meaning you actually use it instead of avoiding the project.
Here’s why this style of tool stands out in practice:
- Better handling in tight spaces like closets, hallways, and small garages
- Faster cuts than a manual handheld saw, especially on sheet goods
- More predictable results for beginners because the tool feels easier to steer
- Less setup time than dragging out a large saw and building a cutting station
- More project variety: trim, panels, flooring repairs, and light framing tasks
Why DIY projects demand a smaller, smarter saw
DIY work rarely looks like a construction site. Most people cut material on a patio, in a spare room, or on a couple of sawhorses. You often need to make a few precise cuts—not rip hundreds of feet of lumber.
Based on widely accepted industry standards, tool selection should match material thickness, cut type, and working space. A mini power saw fits that reality: it handles common DIY materials while staying manageable for hobbyists and homeowners.
The “right-sized tool” advantage
When a tool feels too big, you unconsciously fight it. That shows up as:
- Wavy cuts because you over-correct mid-pass
- Chipped edges from poor blade alignment or rushed feed rate
- Uneven plunge starts because you don’t feel stable
- More fatigue, which increases mistakes and safety risks
A smaller circular saw helps you keep a steady line and consistent pace, especially on short cuts and awkward angles.
Best DIY uses for the G LAXIA Mini Circular Saw
The most valuable tool isn’t the one with the biggest specs—it’s the one that solves the jobs you actually do.
Below are DIY scenarios where a compact circular saw typically shines.
Cutting plywood and sheet goods cleanly
Sheet goods like plywood and paneling drive many home projects: shelves, cabinet backs, wall features, workbenches, and storage organizers. The challenge involves controlling tear-out while keeping cuts straight.
As recommended by professionals, you’ll get cleaner edges by using a fine-tooth blade for plywood and supporting the sheet fully near the cut line. A mini saw makes it easier to follow a guide rail or straightedge without tipping.
Practical tips that improve results fast:
- Mark your cut line with a sharp pencil and a square
- Score the line lightly with a utility knife to reduce splintering
- Clamp a straightedge and run the saw base against it
- Support both sides of the cut to prevent binding
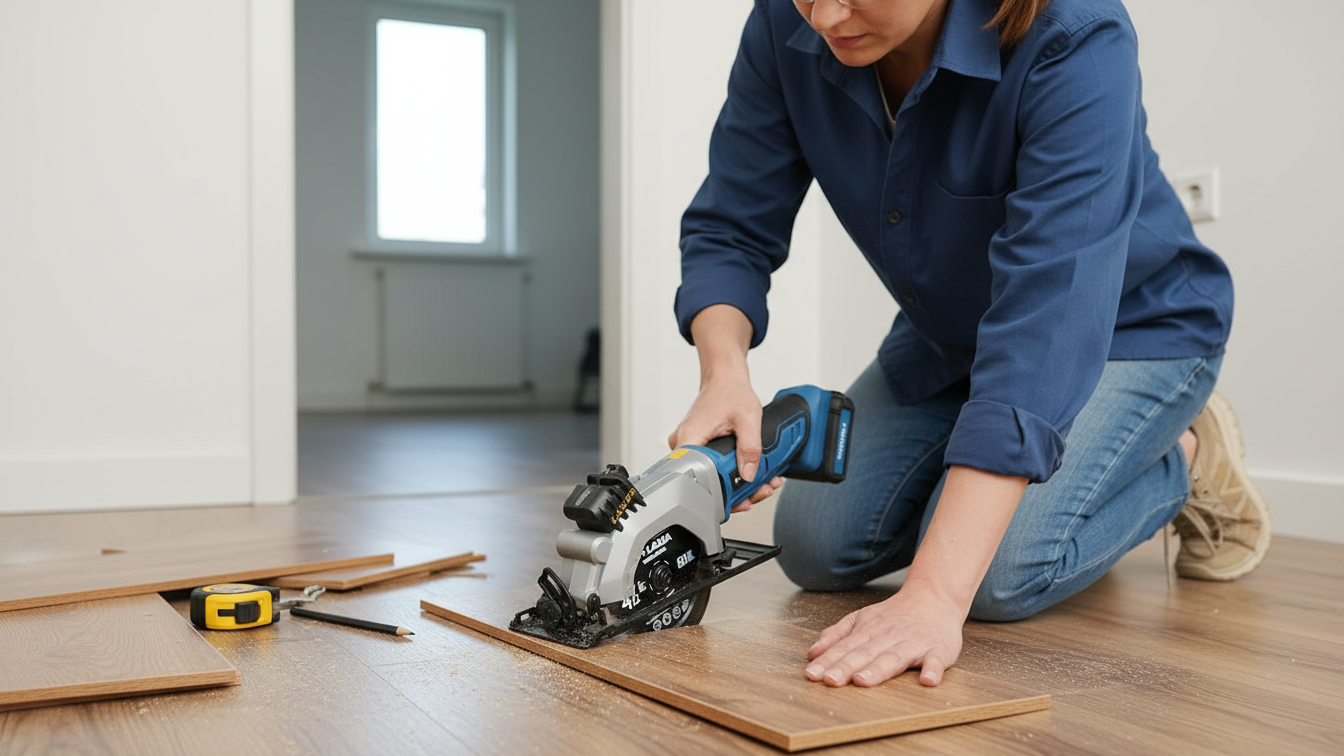
Flooring repairs and small installations
Many DIYers replace a few damaged boards, shorten laminate planks, or cut transitions and underlayment. You need accurate, repeatable crosscuts—often in cramped rooms.
A compact tool helps you maneuver around doorways and corners. According to manufacturer guidelines for most saw types, you should also match blade type to the flooring material and avoid forcing the cut to prevent melting or chipping.
Building shelves, cubbies, and storage projects
Storage builds often involve repetitive cuts on MDF, plywood, and dimensional lumber. Consistency matters more than brute strength.
A mini circular saw supports quick batching:
- Measure and mark all pieces
- Set up a stop block or a repeatable guide
- Cut identical lengths in sequence
- Dry-fit before fastening
This workflow reduces measurement errors and speeds up assembly.
Trim work and thin stock cutting
While a miter saw often dominates trim work, a compact circular saw can handle many trim-related cuts when space or budget limits your setup.
If you pair it with a simple miter guide or a speed square, you can produce solid results on:
- Baseboard repairs
- Door casing adjustments
- Small accent wall slats
- Utility trim in closets or garages
DIY furniture upgrades and refurbishing
Upcycling furniture often means removing damaged sections, cutting new panels, or resizing a top. You typically cut small pieces that feel unsafe with a big saw because the workpiece moves easily.
A smaller handheld saw gives you better “touch” and makes it easier to keep the base flat while you guide the cut.
Related:
Why the Ryobi 18V Circular Saw is a Game-Changer for Beginner Woodworkers
How to Tie in a Gable Roof to an Existing Roof: Step-by-Step Guide for Homeowners
What to look for in a mini circular saw (and why it matters)
Even within the mini category, designs vary. According to widely accepted industry standards, these factors influence cut quality, safety, and long-term satisfaction.
1) Ergonomics and stability
Comfort affects accuracy. If the handle angle forces your wrist into a strained position, your cut line drifts.
Look for:
- A grip that feels secure without squeezing hard
- A base that sits flat and doesn’t rock
- A trigger you can control smoothly
2) Blade options and material compatibility
DIYers cut many materials, and blade choice shapes results more than most people expect.
As recommended by professionals:
- Use more teeth for cleaner cuts in plywood and laminates
- Use fewer teeth for faster cuts in framing lumber
- Use the correct blade type for specialty materials
If you treat blade selection like an accessory decision, you’ll keep fighting tear-out and burn marks.
3) Depth control for real-world tasks
Depth adjustment helps you avoid cutting into your work surface and helps you match material thickness. It also improves safety because excess blade exposure increases risk.
A good rule of thumb: set blade depth so the teeth extend only slightly below the material during the cut.
4) Visibility and dust management
Visibility matters when you cut freehand, and dust control matters when you cut indoors.
According to industry experts, DIYers often underestimate how quickly fine dust spreads through a home. Use a vacuum attachment if available, and cut outside when possible.
How to get straight, chip-free cuts (even as a beginner)
A mini circular saw can feel intuitive, but technique still matters. If you want cleaner cuts immediately, focus on setup and blade control rather than “muscling through.”
Use this simple “pro” cutting checklist
Before you pull the trigger, run through this list:
- Check blade sharpness and correct installation
- Mark the waste side clearly to avoid cutting on the wrong side of the line
- Clamp the workpiece so it cannot shift
- Support the offcut so it doesn’t pinch the blade near the end
- Start the saw before contacting the material, then feed steadily
Guide methods that dramatically improve accuracy
If you struggle with straight cuts, don’t rely on freehand skill. Use a guide.
Options that work well for DIY:
- A clamped straightedge (fast and inexpensive)
- A long level or aluminum ruler as a guide
- A speed square for short crosscuts
- Painter’s tape on the cut line to reduce top-surface chipping
Safety essentials for a compact circular saw
Smaller doesn’t mean harmless. A spinning blade still demands respect.
Based on manufacturer guidelines and widely accepted industry standards, follow these safety practices every time:
- Wear eye protection and hearing protection
- Keep cords clear of the cut path
- Avoid loose sleeves and tie back long hair
- Use two hands whenever the design allows stable control
- Let the blade stop fully before setting the saw down
Preventing kickback and binding
Kickback happens when the blade binds and the tool jumps backward or twists.
Reduce the risk by:
- Supporting the material near the cut so it doesn’t sag and pinch
- Keeping the base flat against the workpiece
- Feeding the saw at a steady pace—never forcing it
- Replacing dull blades early
Where the G LAXIA Mini Circular Saw fits in a DIY toolkit
If you already own tools, you might wonder if this overlaps with what you have. In practice, it complements common DIY staples.
Mini circular saw vs. jigsaw
A jigsaw handles curves and interior cutouts well, but it can wander on long straight lines. A compact circular saw usually wins for straight cuts, cleaner edges, and faster work on sheet goods.
Mini circular saw vs. full-size circular saw
A full-size saw excels at thick framing and long rips, but it can feel awkward on small pieces and indoor projects. A mini saw often becomes the “grab-and-go” choice for household tasks and quick builds.
Mini circular saw vs. manual handheld saw
A manual handheld saw remains useful for silent work and very small cuts, but it demands more time and effort. For repeat cuts or harder materials, a mini power saw saves hours across a month of DIY work.
Project ideas that become easier with a mini saw
If you want practical inspiration, these projects typically become noticeably faster with a compact saw:
- Floating shelves with plywood tops and clean edge banding
- A basic entryway shoe rack from MDF or plywood
- A closet organizer with simple partitions and shelves
- Replacing a damaged laminate plank or trimming transitions
- A small workbench top cut from a sheet good
As recommended by professionals, start with a project that uses straight cuts and forgiving tolerances. You’ll build confidence quickly.
FAQ: G LAXIA Mini Circular Saw for DIY projects
Is a mini circular saw strong enough for real home projects?
Yes for many common tasks like plywood, MDF, laminate flooring cuts, trim repairs, and light dimensional lumber work. According to industry experts, most home DIY cuts prioritize precision and convenience over maximum cutting depth.
Can beginners use a compact circular saw safely?
Yes, if they follow safe setup habits: clamp the work, support both sides of the cut, wear eye protection, and use the correct blade. Based on manufacturer guidelines, steady feed rate and proper blade depth reduce mistakes.
How do I avoid splintering on plywood?
Use a fine-tooth blade, score the cut line, apply painter’s tape, and cut with a guide. Keep the saw base flat and don’t rush the last few inches of the cut.
What’s the easiest way to cut perfectly straight lines?
Clamp a straightedge and run the saw’s base along it. This method removes most beginner error and creates repeatable cuts across multiple pieces.
Do I need a workbench to use it?
No. You can use sawhorses, foam insulation boards on the floor, or a sturdy table, as long as you support the material and keep the blade clear of whatever sits underneath.
Can it replace a miter saw?
Not completely. A miter saw still wins for repetitive angled trim cuts. But for quick crosscuts, panel trimming, and projects where space matters, a compact saw covers a lot.
What maintenance should I do?
Keep the tool clean, check blade tightness, and replace dull blades. According to widely accepted industry standards, dull blades increase burn marks, tear-out, and kickback risk.
Conclusion: A small tool that unlocks bigger DIY wins
DIY success often comes down to momentum: you start a project, make clean cuts, and finish confidently instead of stalling out after the first frustrating mistake. The G LAXIA Mini Circular Saw earns “must-have” status because it makes accurate cutting accessible in real homes—small spaces, short timelines, and mixed materials.
If you want a tool that helps you cut faster, cleaner, and with less stress, add this compact option to your DIY kit and start with a simple shelf or organizer project this week.