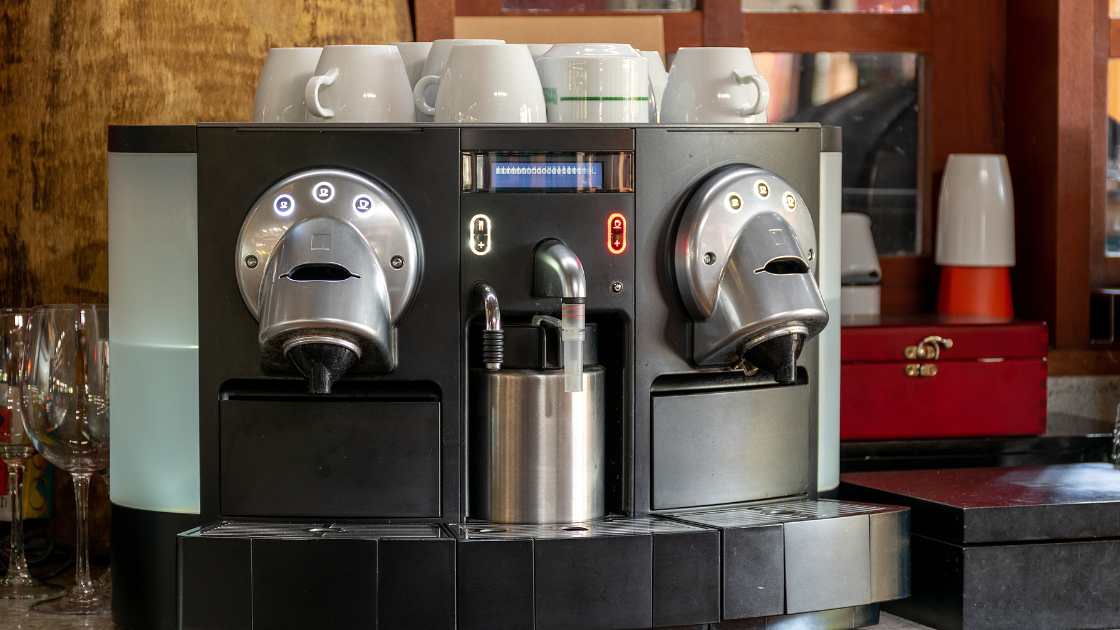
Window treatments are an essential part of any home decor. They not only provide privacy but also add style and elegance to your living space. Blinds, Shades, and Drapery are some of the most versatile window treatment options.Continue reading →
Best places to live in Spain in 2023, including Benidorm
Property in Spain
Where to live in Spain? This question worries many expats who hope to move to the country in 2023. The sunny country continues to be a magnet for visitors from all over the world, and despite rising inflation and living costs. Moving to Spain is still attractive if you are one of those who want to move closer to warmth and sun.Continue reading →
The Top 10 Kitchen Appliances Every Home Cook Needs
As a home cook, having the right kitchen appliances can make all the difference in the world. Whether you’re a beginner or a seasoned pro, having the right tools at your disposal can save you time and help you create delicious meals with ease. In this article, we’ll cover the top 10 kitchen appliances that every home cook needs.
Top 10 Kitchen Appliances Every Home Cook Needs
Food Processor
A food processor is a versatile kitchen appliance that can help you chop, puree, and mix ingredients quickly and efficiently. With a food processor, you can make everything from sauces and dips to nut butters and pie crusts.
Stand Mixer
A stand mixer is a must-have appliance for anyone who loves to bake. It can help you mix, knead, and whip ingredients with ease, and it comes with a range of attachments that make it perfect for making everything from bread dough to cake batter.
Blender
A blender is an essential tool for making smoothies, soups, and sauces. With a powerful blender, you can quickly and easily puree vegetables, fruits, and other ingredients to create healthy and delicious meals.
Pressure Cooker
A pressure cooker is a game-changer for busy home cooks. It can help you cook meals quickly and easily, and it’s perfect for making everything from soups and stews to rice and beans.
Slow Cooker
A slow cooker is another appliance that can help you save time in the kitchen. With a slow cooker, you can prepare meals in advance and let them cook all day, so they’re ready to eat when you get home.
Toaster Oven
A toaster oven is a versatile appliance that can be used for everything from toasting bread to baking cookies. It’s perfect for small batches of food and can be a great alternative to using your full-size oven.
Electric Kettle
An electric kettle is a convenient appliance that can help you boil water quickly and easily. It’s perfect for making tea, coffee, or instant oatmeal, and it’s much faster than using a stovetop kettle.
Immersion Blender
An immersion blender is a handheld tool that can be used to puree soups and sauces right in the pot. It’s also great for making smoothies and other blended drinks.
Air Fryer
An air fryer is a healthier alternative to deep-frying foods. It uses hot air to cook food, so you can enjoy crispy, delicious meals without all the added oil and fat.
Food Scale
A food scale is an essential tool for anyone who loves to bake. It can help you measure ingredients accurately, so you can create perfect recipes every time.
Read More: Oil Space Heater Making Clicking Noise
FAQ’s
What is the difference between a food processor and a blender?
A food processor and a blender have different functions in the kitchen. A food processor is designed to chop, slice, grate, and puree ingredients quickly and efficiently. It can handle a range of tasks, including making nut butter, grinding meat, and making dough. A blender, on the other hand, is designed to puree ingredients into a smooth, liquid consistency. It’s perfect for making smoothies, soups, and sauces. While there is some overlap in what each appliance can do, they are designed for different purposes.
What are the advantages of using a pressure cooker?
A pressure cooker is a versatile appliance that can save you time in the kitchen. It can cook food up to 70% faster than traditional cooking methods, which is perfect for busy home cooks. It’s also great for cooking tough cuts of meat, as it can tenderize them quickly. Additionally, pressure cookers are energy-efficient, as they use less water and energy than traditional cooking methods. They can be used to make a range of meals, including soups, stews, rice, and beans.
Can a toaster oven replace a traditional oven?
While a toaster oven can’t completely replace a traditional oven, it can be a great alternative for small batches of food. It’s perfect for cooking items like toast, pizza, and cookies, and it can also be used to roast vegetables or bake small casseroles. Additionally, using a toaster oven can save energy, as it uses less electricity than a full-size oven. However, a toaster oven has a smaller capacity than a traditional oven, so it may not be suitable for cooking large meals or items like a turkey.
Conclusion
Whether you’re a beginner or an experienced home cook, having the right kitchen appliances can make all the difference in the world. The top 10 kitchen appliances we’ve covered in this article can help you save time, cook delicious meals, and enjoy your time in the kitchen. Invest in these appliances, and you’ll be on your way to becoming a master home cook in no time.
Benefits of installing tankless water dispenser in home
There are two types of water dispensers available: one with a tank and one without. A tankless water dispenser is a type of water purifier that comes without a tank. There are many benefits to installing a tankless water dispenser, as it promotes hygiene and provides pure water. There are certain things that an individual should know before purchasing a tankless water dispenser. The tankless water dispenser functions by using an electric system. As the water passes through the heater, it becomes warm. An individual does not need to wait for the heated water, as in a storage tank water dispenser. Tankless water dispensers function in the same manner as storage heaters, but the tankless heater does not require any space to install the tank. This article provides a general overview of the benefits of installing a tankless water dispenser in your home.Continue reading →
How to Replace Roman Tub Faucet with No Access Panel
Replacing a Roman tub faucet can be a challenging task, especially when there is no access panel. Access panels are an easy way to replace the faucet, but unfortunately, not all tubs come with access panels. However, with the right tools and instructions, you can replace your Roman tub faucet with no access panel. In this article, we will guide you through the steps required to replace your Roman tub faucet.
Step 1: Gather the Required Tools
Before you begin the replacement process, make sure you have all the necessary tools. These tools include:
Adjustable wrench
Phillips head screwdriver
Flathead screwdriver
Pliers
Silicone caulk
Replacement Roman tub faucet
Step 2: Turn off the Water Supply
The first step to replacing your Roman tub faucet is to turn off the water supply. Locate the shut-off valves under the tub or behind the wall and turn them off. If you cannot locate the shut-off valves, you will need to turn off the main water supply.
Step 3: Remove the Handles
Use a flathead screwdriver to remove the decorative cap on the handles. Once you remove the cap, you will see a screw that holds the handle in place. Use a Phillips head screwdriver to remove the screw and pull off the handle.
Step 4: Remove the Escutcheon
The escutcheon is the plate that surrounds the faucet. Use a flathead screwdriver to pry off the escutcheon. Be careful not to damage the wall or the tub.
Step 5: Remove the Spout
The spout is the part of the faucet that delivers water into the tub. Use an adjustable wrench to loosen the nut that holds the spout in place. Once you loosen the nut, you can pull the spout off.
Step 6: Remove the Old Faucet
The old faucet is held in place by mounting nuts. Use pliers to loosen and remove the mounting nuts. Once you remove the mounting nuts, you can lift the old faucet off.
Step 7: Install the New Faucet
Place the new faucet in the same position as the old faucet. Tighten the mounting nuts with pliers. Place the spout on the faucet and tighten the nut with an adjustable wrench.
Step 8: Reinstall the Escutcheon and Handles
Apply silicone caulk around the escutcheon and reattach it to the wall. Reattach the handles by tightening the screws with a Phillips head screwdriver.
Step 9: Turn on the Water Supply
Once you have reinstalled the new faucet, turn on the water supply and check for any leaks. If there are no leaks, your new Roman tub faucet is now installed.
FAQ’s
How do I know if my Roman tub faucet has an access panel?
You can check for an access panel on the underside of your tub or on the adjacent wall. If there is no panel, you will need to remove the faucet from the top of the tub.
Can I install a new Roman tub faucet without removing the old one?
No, you will need to remove the old faucet before installing the new one. This requires accessing the mounting nuts under the tub or wall, which can be done without an access panel.
What if I encounter any problems during the installation process?
A: If you encounter any issues during the installation process, such as stripped screws or difficulty removing the old faucet, it may be best to seek the assistance of a professional plumber. A plumber has the expertise and tools to quickly and safely install your new Roman tub faucet, without causing any damage to your tub or walls.
Conclusion
Replacing a Roman tub faucet with no access panel may seem like a daunting task, but it can be done with the right tools and instructions. Follow the steps outlined in this article to replace your old faucet with a new one. Remember to turn off the water supply and check for leaks once you have installed the new faucet. With a little patience and effort, you can have a brand new Roman tub faucet in no time.
Choosing the Right Portable Garage Floor for Your Needs
Portable garages are an excellent investment for homeowners looking for extra storage space for their vehicles, tools, or equipment. They are easy to install and offer a cost-effective alternative to permanent garages. However, to get the most out of your portable garage, you need to ensure that the floor is strong enough to withstand heavy loads, resistant to wear and tear, and provides a stable surface for your equipment. Here are some key factors to consider when choosing the right portable garage floor for your needs.
Floor Material
The most common materials used for portable garage floors are wood, concrete, and PVC tiles. Wooden floors are affordable, easy to install, and provide a natural look. However, they are prone to rot and can be damaged by moisture or heavy loads. Concrete floors are durable, strong, and provide excellent resistance to wear and tear. They are suitable for heavy equipment and vehicles. PVC tiles are lightweight, easy to install, and offer excellent shock absorption. They are perfect for garages used as workshops or storage areas.
Floor Thickness
The thickness of the floor is critical in determining its durability and load-bearing capacity. Most portable garages come with floors that range from 10mm to 18mm in thickness. A thicker floor provides better support for heavy equipment and vehicles, and can resist impact and wear and tear better than thinner floors.
Floor Coating
A floor coating can add an extra layer of protection to your portable garage floor. Epoxy coatings are popular because they are durable, easy to apply, and provide an attractive finish. They also resist oil stains, chemicals, and abrasions. Other coating options include polyurethane, acrylic, and latex. The type of coating you choose will depend on your specific needs and preferences.
Installation
The ease of installation is another critical factor to consider when choosing a portable garage floor. Some floors require professional installation, while others can be installed by the homeowner. PVC tiles are the easiest to install and can be done without any special tools or equipment. Wooden and concrete floors require more preparation and expertise, and may require additional equipment such as a concrete mixer or a saw.
FAQ’s
What is the best material for a portable garage floor?
The best material for a portable garage floor depends on your specific needs. Wooden floors are affordable and easy to install, but are prone to rot and damage from moisture or heavy loads. Concrete floors are durable, strong, and provide excellent resistance to wear and tear, making them suitable for heavy equipment and vehicles. PVC tiles are lightweight, easy to install, and offer excellent shock absorption, making them perfect for garages used as workshops or storage areas.
How thick should a portable garage floor be?
The thickness of a portable garage floor is critical in determining its durability and load-bearing capacity. Most portable garages come with floors that range from 10mm to 18mm in thickness. A thicker floor provides better support for heavy equipment and vehicles, and can resist impact and wear and tear better than thinner floors. However, the thickness you choose will depend on the type of equipment you plan to store in your garage.
Can I install a portable garage floor myself?
you can install some types of portable garage floors yourself, but others may require professional installation. PVC tiles are the easiest to install and can be done without any special tools or equipment. Wooden and concrete floors require more preparation and expertise, and may require additional equipment such as a concrete mixer or a saw. If you are unsure about your ability to install a garage floor, it is best to consult with a professional.
Conclusion
In conclusion, selecting the right portable garage floor for your needs requires careful consideration of the material, thickness, coating, and installation. Choosing the right floor can provide excellent support for your equipment, protect your garage from wear and tear, and enhance its aesthetic appeal. It is essential to research and compare different flooring options to ensure you make an informed decision.
5 Simple Steps to a Clean and Organized Pantry
A clean and organized pantry can make meal prep a breeze and save you time and money in the long run. It can also help you avoid the frustration of searching for ingredients and discovering expired items. Follow these simple steps to get your pantry in order and keep it that way.
Step 1: Clear it Out
The first step to a clean and organized pantry is to empty it completely. Take everything out of the pantry and lay it out on a large surface, such as a table or counter. This will give you a better idea of what you have and what needs to be tossed.
As you go through each item, check for expiration dates and throw out anything that has gone bad. If you have duplicates of any items, consider donating them to a local food bank or shelter. Also, consider discarding any items that you have not used in a long time or that no longer fit your dietary preferences.
Step 2: Wipe it Down
Once your pantry is empty, take the opportunity to give it a good cleaning. Use a damp cloth or sponge to wipe down the shelves, walls, and floor of the pantry. You can also use a vacuum to remove any crumbs or debris that may have accumulated.
Step 3: Categorize and Sort
Now that your pantry is clean, it’s time to categorize and sort the items you have. Group similar items together, such as canned goods, pasta, grains, and snacks. This will make it easier to find what you need when you’re cooking or meal planning.
Consider using baskets, bins, or containers to further organize your items. These can be especially helpful for smaller items, such as spice jars or snack packs. Label each container with the contents to make it easy to find what you need.
Step 4: Maximize Space
Once you have everything sorted and organized, it’s time to maximize the space in your pantry. Consider adding shelves, hooks, or even a lazy Susan to help you make the most of the available space.
Also, consider using the “First In, First Out” (FIFO) method when stocking your pantry. This means putting the oldest items in the front and the newest items in the back. This can help prevent food waste and ensure that you’re using up items before they expire.
Step 5: Maintain Regularly
Finally, the key to a clean and organized pantry is to maintain it regularly. Set aside time each month to check for expired items and reorganize as needed. Also, make a habit of putting items back in their designated spots after use to prevent clutter from building up.
FAQ’s
How often should I clean and organize my pantry?
It is recommended to clean and organize your pantry at least once every three months. This will ensure that expired items are discarded and that your pantry remains organized.
Can I use any type of container for organizing my pantry?
While you can use any type of container, it is recommended to use clear, airtight containers made of materials such as plastic, glass or acrylic. This will help to keep food fresh for longer and prevent pests from getting in.
How can I make the most of the available space in my pantry?
To make the most of your pantry space, consider using vertical storage solutions, such as stacking containers and adding shelves. Also, use the FIFO (First In, First Out) method for storing items, which means placing older items in the front and newer items in the back to ensure that nothing goes to waste.
Conclusion
In conclusion, a clean and organized pantry is an essential part of any efficient kitchen. By following these simple steps, you can create a pantry that is easy to navigate, saves you time and money, and promotes healthy eating habits.
Renovation Nation: A Comprehensive Look at Home Improvement
Home improvement is an important aspect of homeownership. It can be a way to personalize your living space, increase your home’s functionality, or even add value to your property. However, home improvement can be a costly endeavor, and it’s significant to plan ahead to ensure that you stay within your budget. In this article, we’ll take a comprehensive look at home improvement and discuss some tips and tricks for a successful renovation.Continue reading →
Transplanting Asparagus: When, Why, and How to Make the Move
Asparagus is a popular and delicious vegetable that can be grown in many home gardens. However, as the years go by, the asparagus plants may outgrow their original location, and it becomes necessary to transplant them to a new spot. This article will discuss when, why, and how to transplant asparagus successfully.
When to transplant asparagus
Asparagus is best transplanted during its dormant season, which is in the late fall after the foliage has turned yellow and brown. This time frame typically falls between October and December, depending on your location. If you live in a warm climate, transplanting can be done during the winter when the temperatures are cooler.
Why transplant asparagus
There are several reasons why you may need to transplant your asparagus plants. One common reason is overcrowding. Asparagus grows slowly, but steadily, and after several years, the plants may begin to compete for space and nutrients. Overcrowded plants can lead to stunted growth and smaller spears.
Another reason for transplanting asparagus is to relocate the plants to a more suitable spot. For example, if the original planting site is in a shaded area, and the plants are not getting enough sunlight, transplanting them to a sunnier spot will promote healthier growth.
How to transplant asparagus
- Preparing the new location – The new location should be well-drained and have a pH level of 6.0-7.5. Prepare the soil by removing any rocks, weeds, or debris. Add compost or well-rotted manure to improve the soil structure.
- Digging up the plants – After the foliage has turned yellow and brown, use a spade or fork to dig up the asparagus crowns. Be careful not to damage the roots.
- Separating the crowns – Separate the crowns by gently pulling them apart. Each crown should have its own set of roots.
- Planting the crowns – Dig a trench in the prepared soil that is deep enough to accommodate the roots of the crowns. Spread the roots out in the trench, and cover them with soil. Space the crowns 18-24 inches apart.
- Watering and mulching – After planting, water the crowns thoroughly. Apply a layer of mulch around the plants to help retain moisture and suppress weeds.
FAQ
How deep to transplant asparagus?
When transplanting asparagus, dig a trench that is about 6-8 inches deep and wide enough to accommodate the roots. Space the asparagus crowns 18-24 inches apart within the trench.
How do you divide and replant asparagus?
To divide and replant asparagus, dig up the mature crowns in the fall after the foliage has turned yellow and brown. Gently separate the crowns and roots, making sure each section has at least one healthy bud. Replant the divided sections in well-prepared soil that is free of weeds, debris, and rocks.
How do you dig up asparagus roots?
To dig up asparagus roots, use a spade or fork to carefully loosen the soil around the crown. Dig deep enough to loosen the soil and expose the roots without damaging them. Be gentle when pulling up the crown and roots to avoid breaking them.
Do asparagus seedlings transplant well?
Asparagus is typically grown from crowns or roots, rather than seedlings. While it is possible to grow asparagus from seeds, it is a much slower process and requires more care and attention. Asparagus seedlings can be transplanted, but they may take longer to establish and produce a harvest compared to crowns or roots.
Conclusion
Transplanting asparagus may seem like a daunting task, but with the right preparation and care, it can be done successfully. Remember to transplant during the dormant season, transplant for reasons such as overcrowding or a more suitable location, and follow the steps for a successful transplant. By transplanting your asparagus, you can ensure healthy growth and bountiful harvests for years to come.
Where is it profitable to buy a house in Turkey?
Potential buyers of Turkish property often wonder which cities, locations, and villas prices in Istanbul in Turkey have the most affordable housing. The official source is Turk.Estate analyzed this topic and prepared up-to-date information that will come in handy when looking for the perfect apartment for leisure or business.Continue reading →


